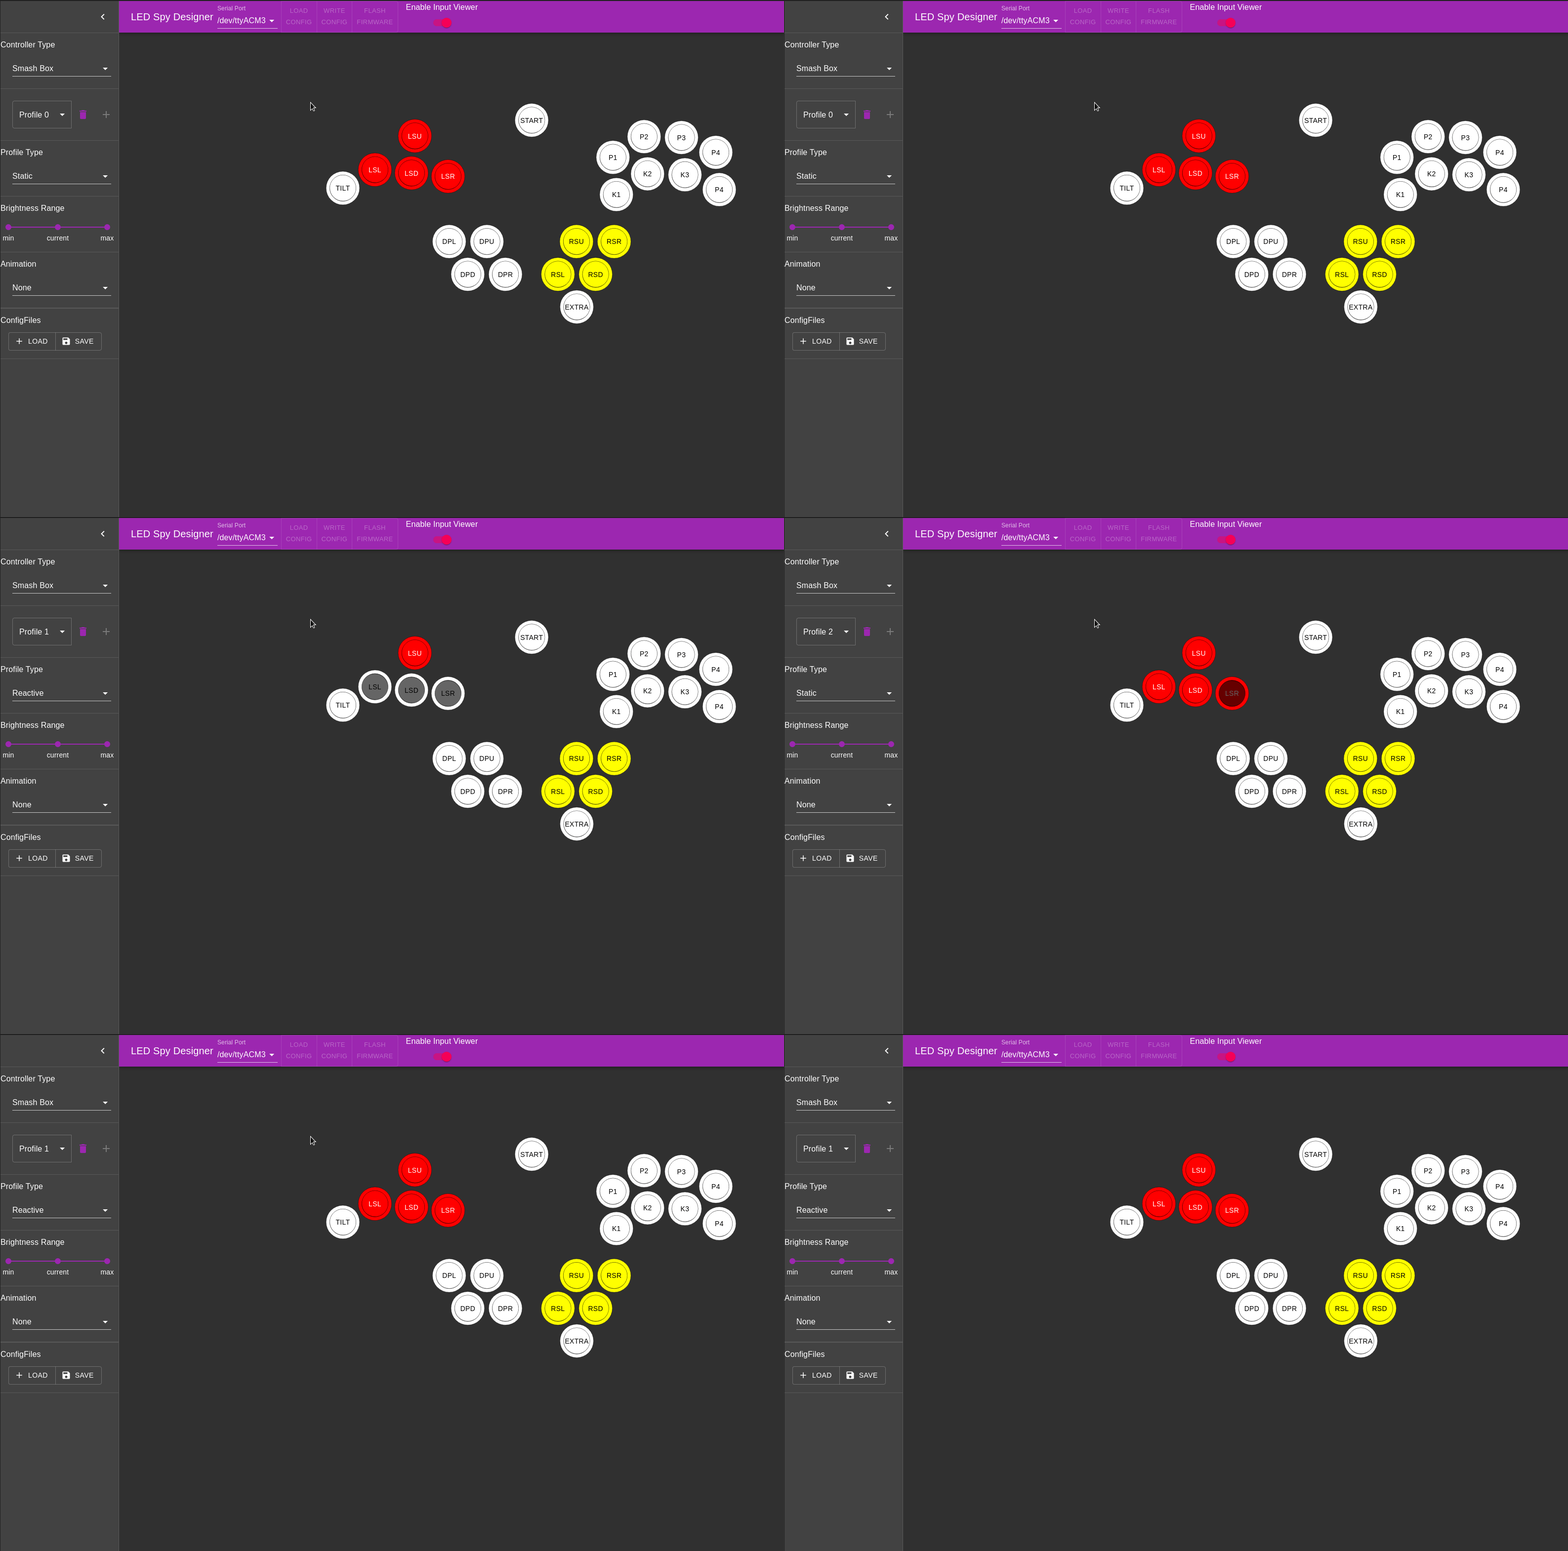
Configuration
Now that you have the designer installed, we will walk you through initial setup and configuration of your controller.
Firmware Installation
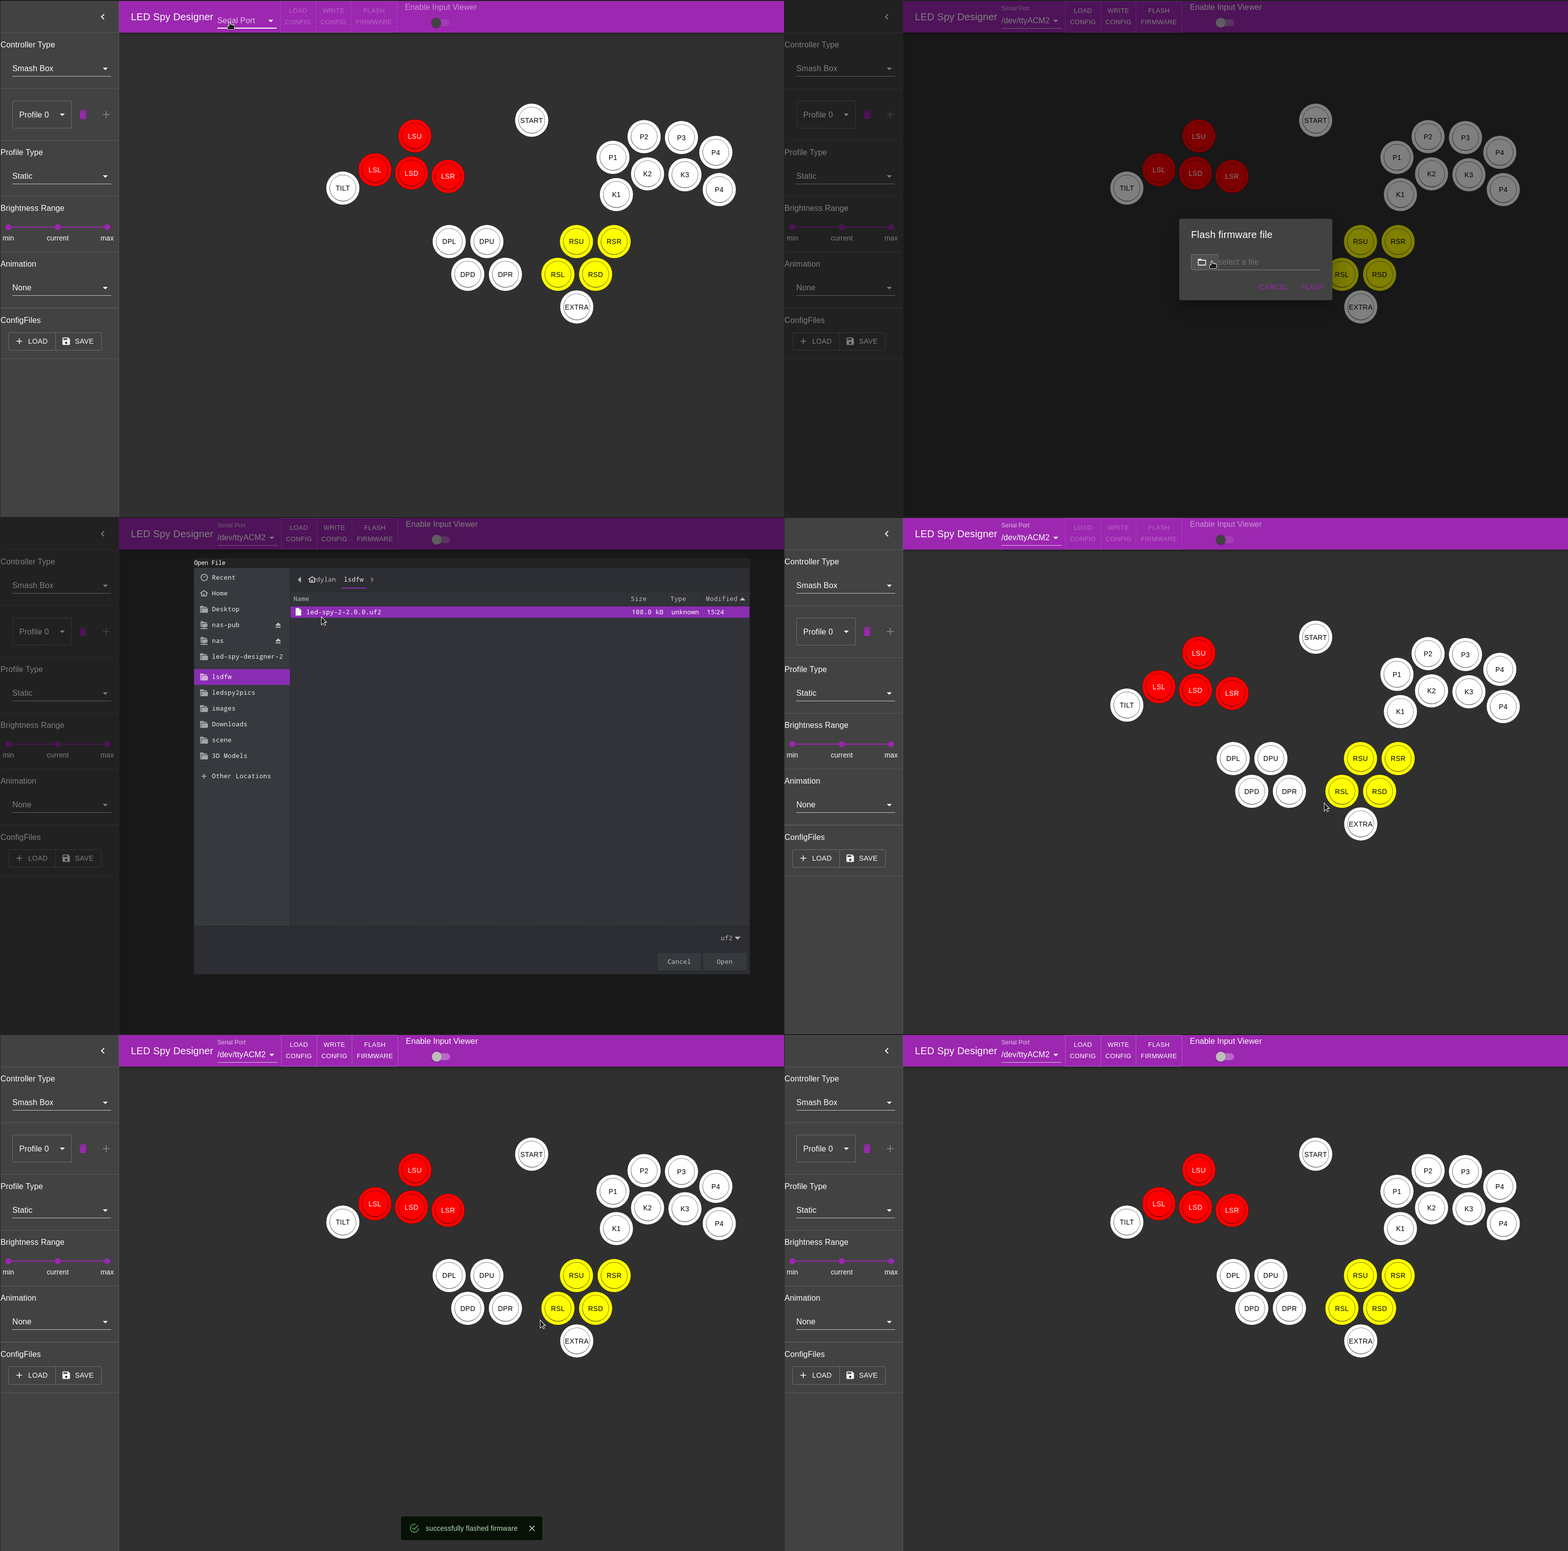
The first thing you should do with the LED Spy Board once the designer is installed, is to download the latest firmware and ensure your board is up to date. Firmware can be flashed directly through the designer by following the steps demonstrated below.
Managing Saved Configuration
The designer has the ability to save and load configuration from files with the extension .lspy.
Loading Config From a File
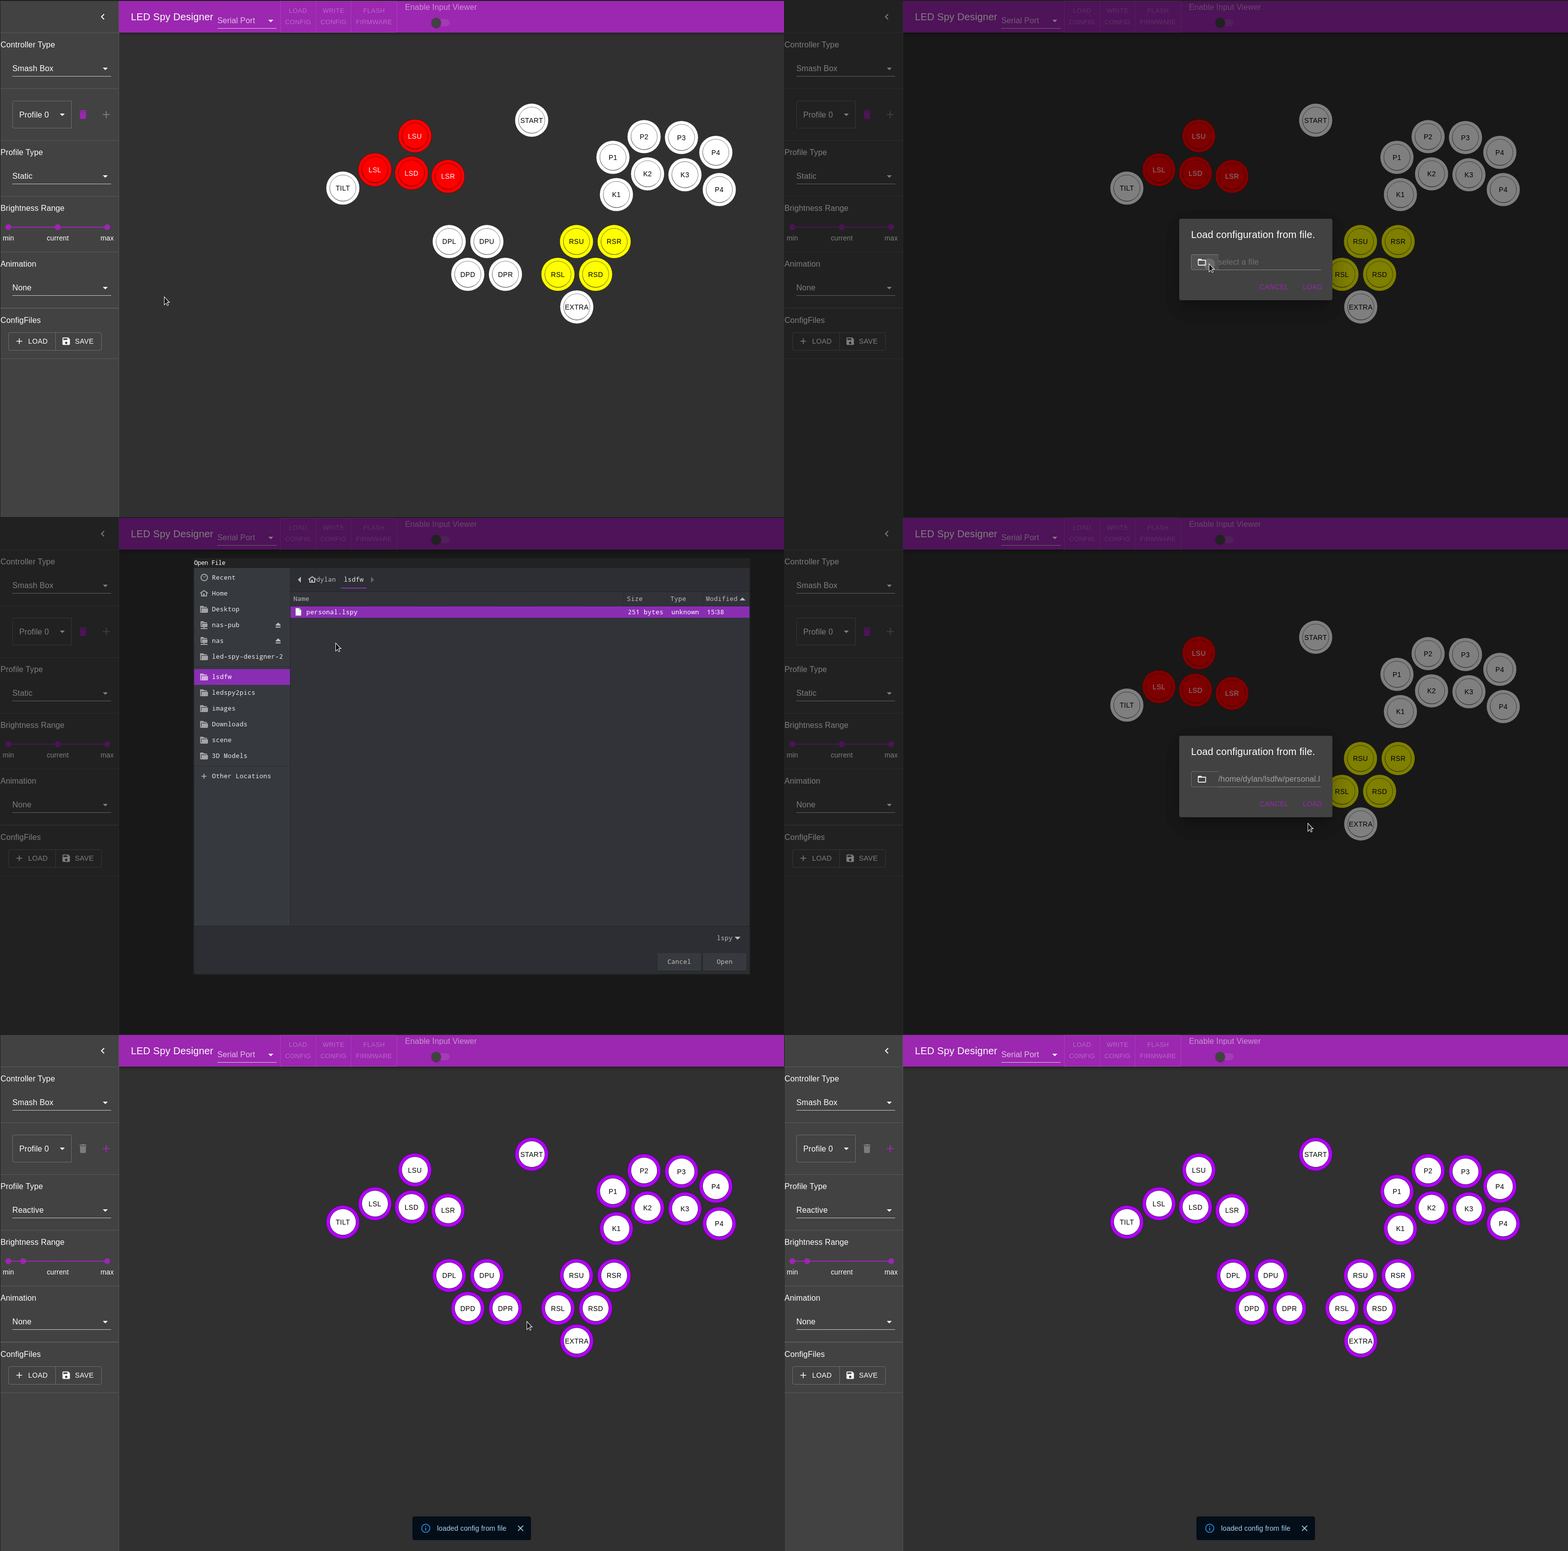
The designer has the ability to load saved configuration from a file as shown below.
Saving Config to a File
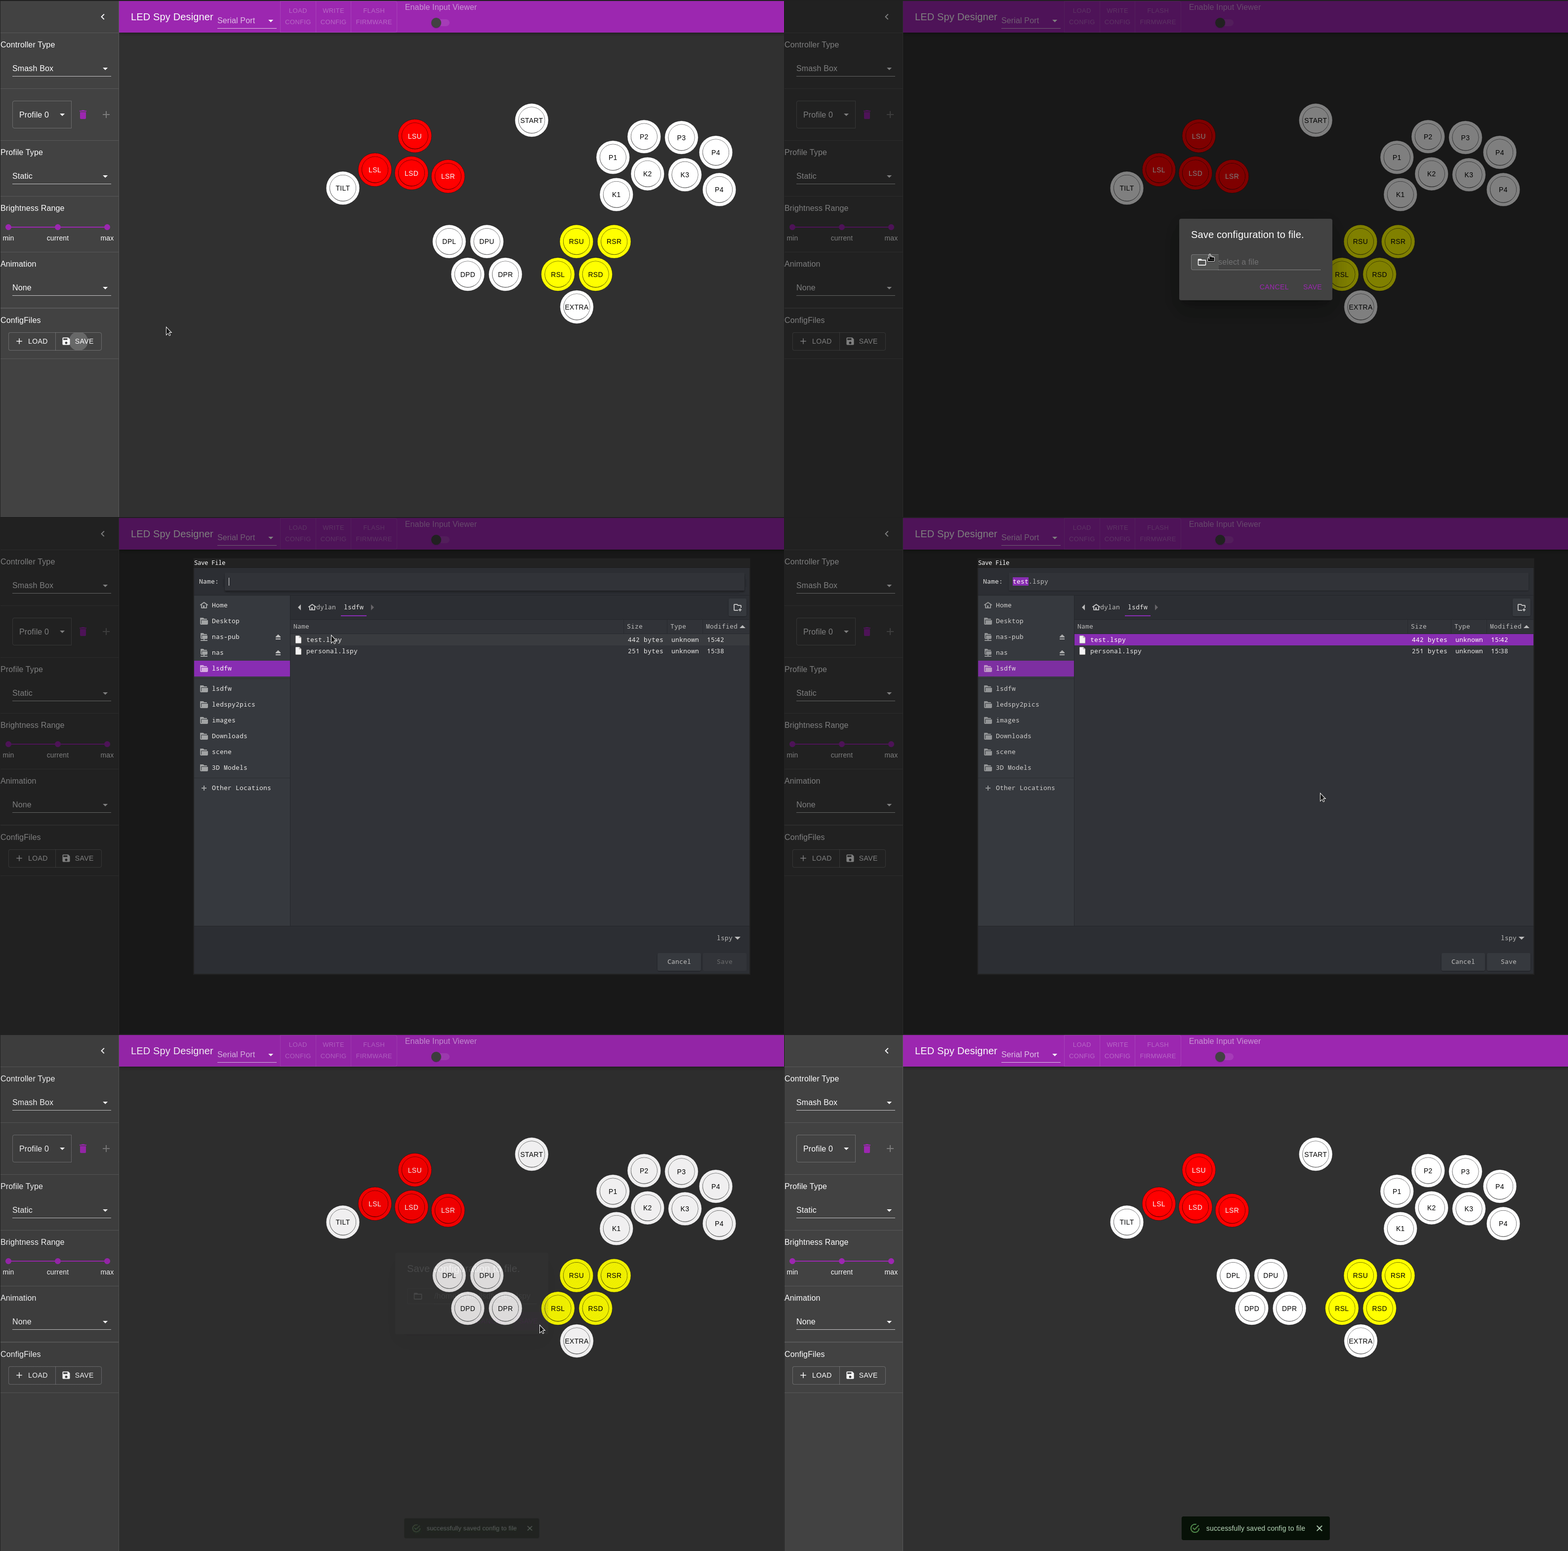
The designer has the ability to save configuration to a file as shown below.
Reading and Writing Controller Config
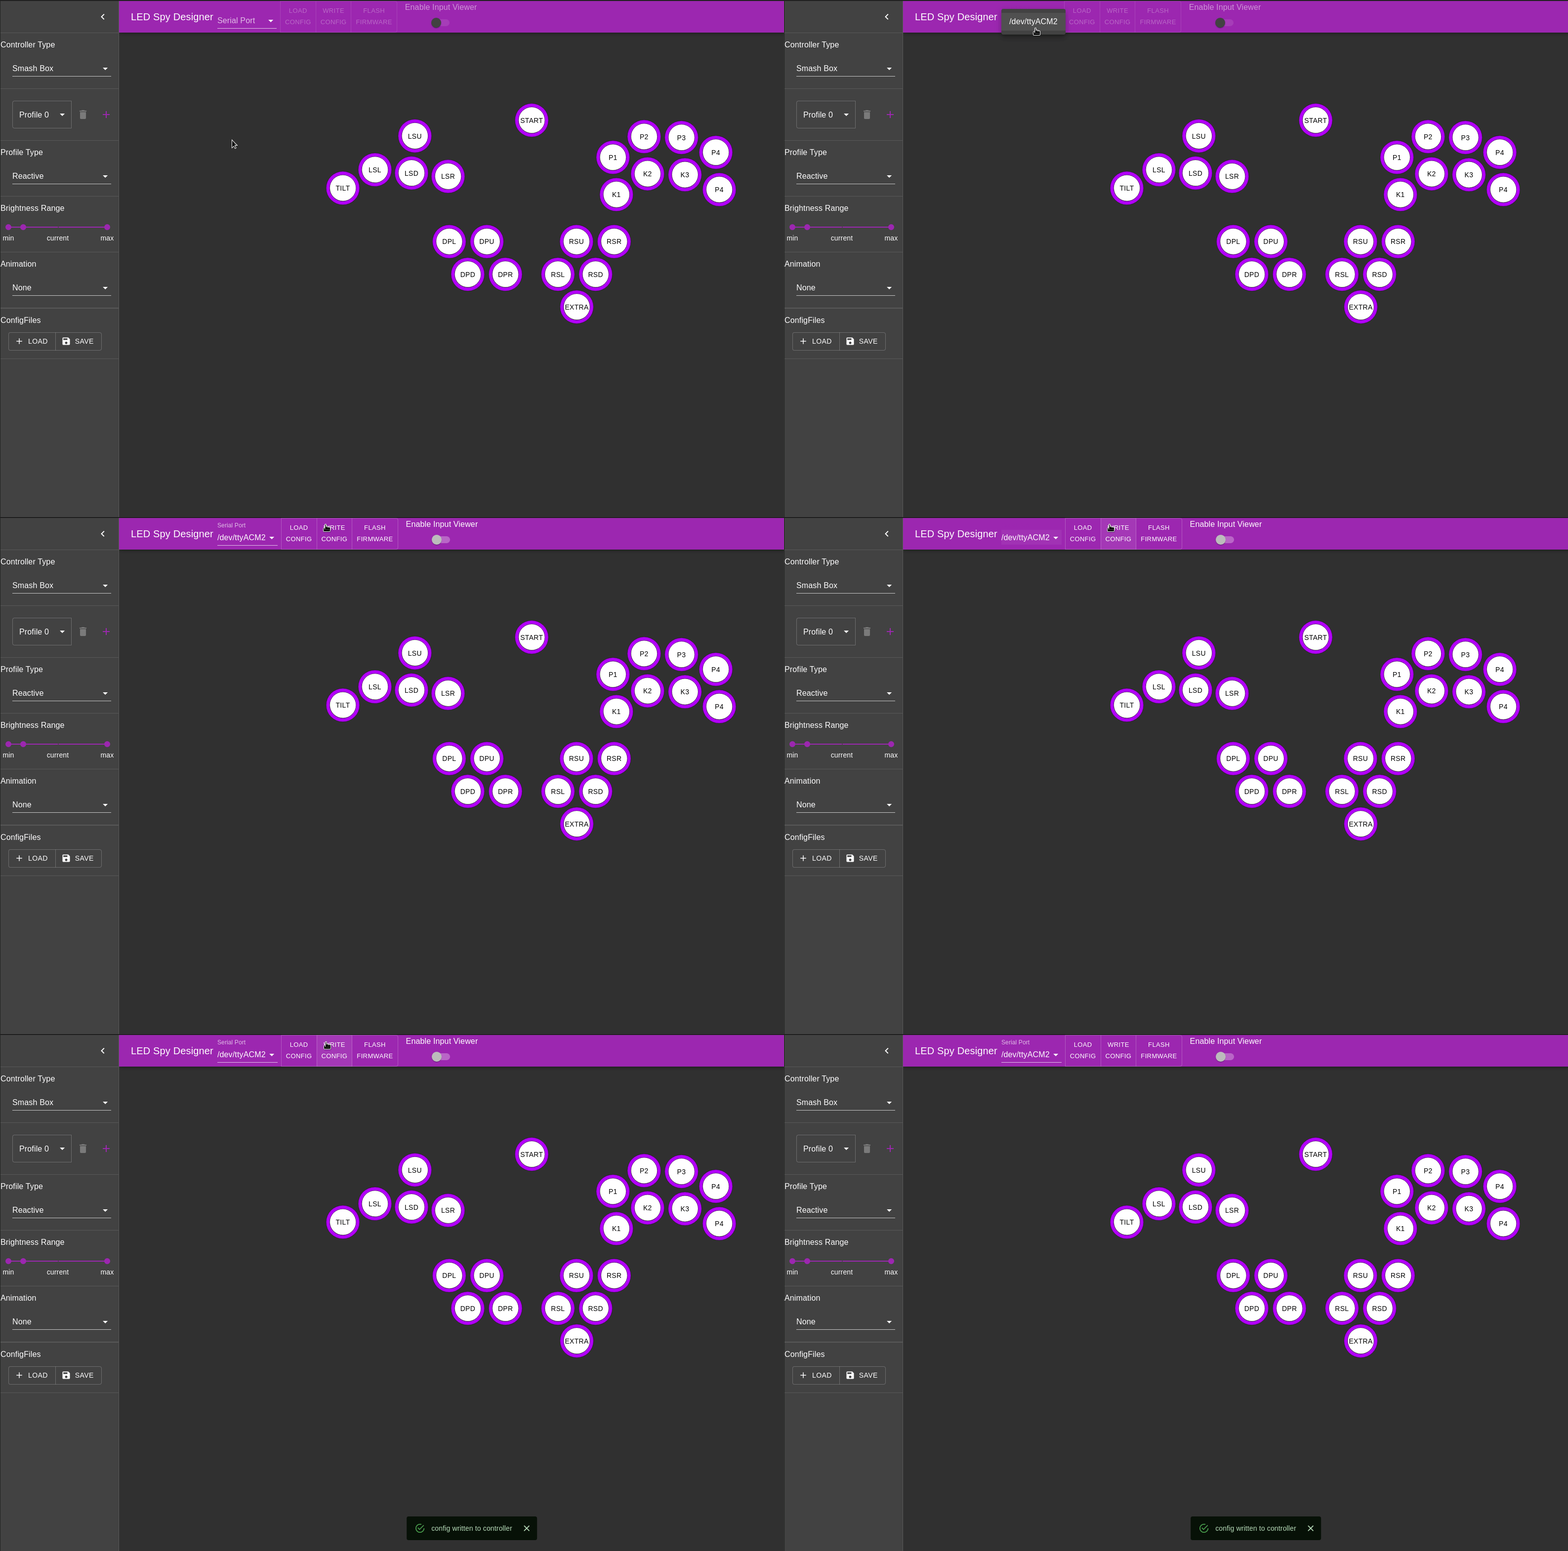
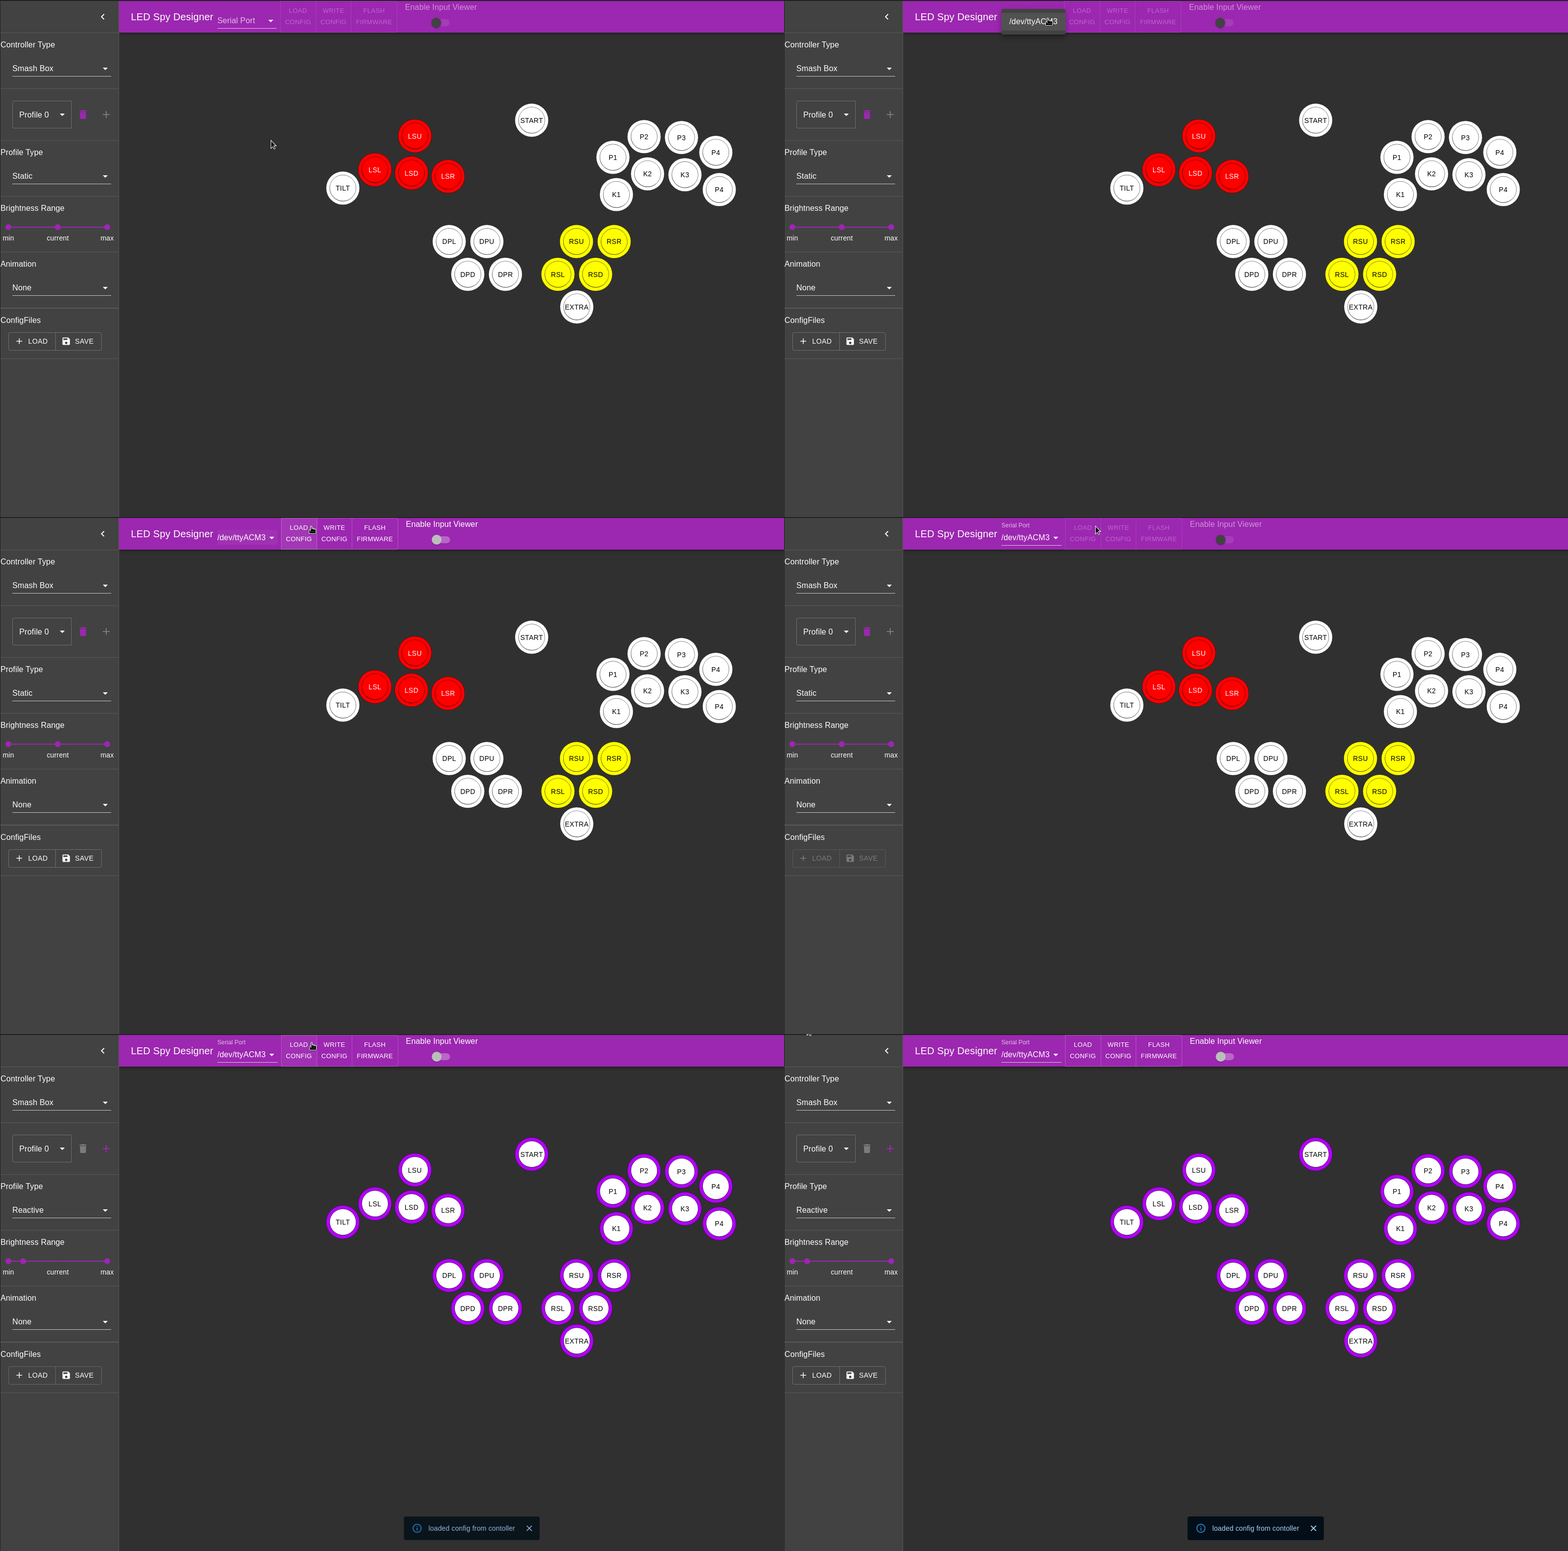
Of course, the most important part of the designer is the ability to save/load configuration to/from your controller.
Writing To Controller
Reading From Controller
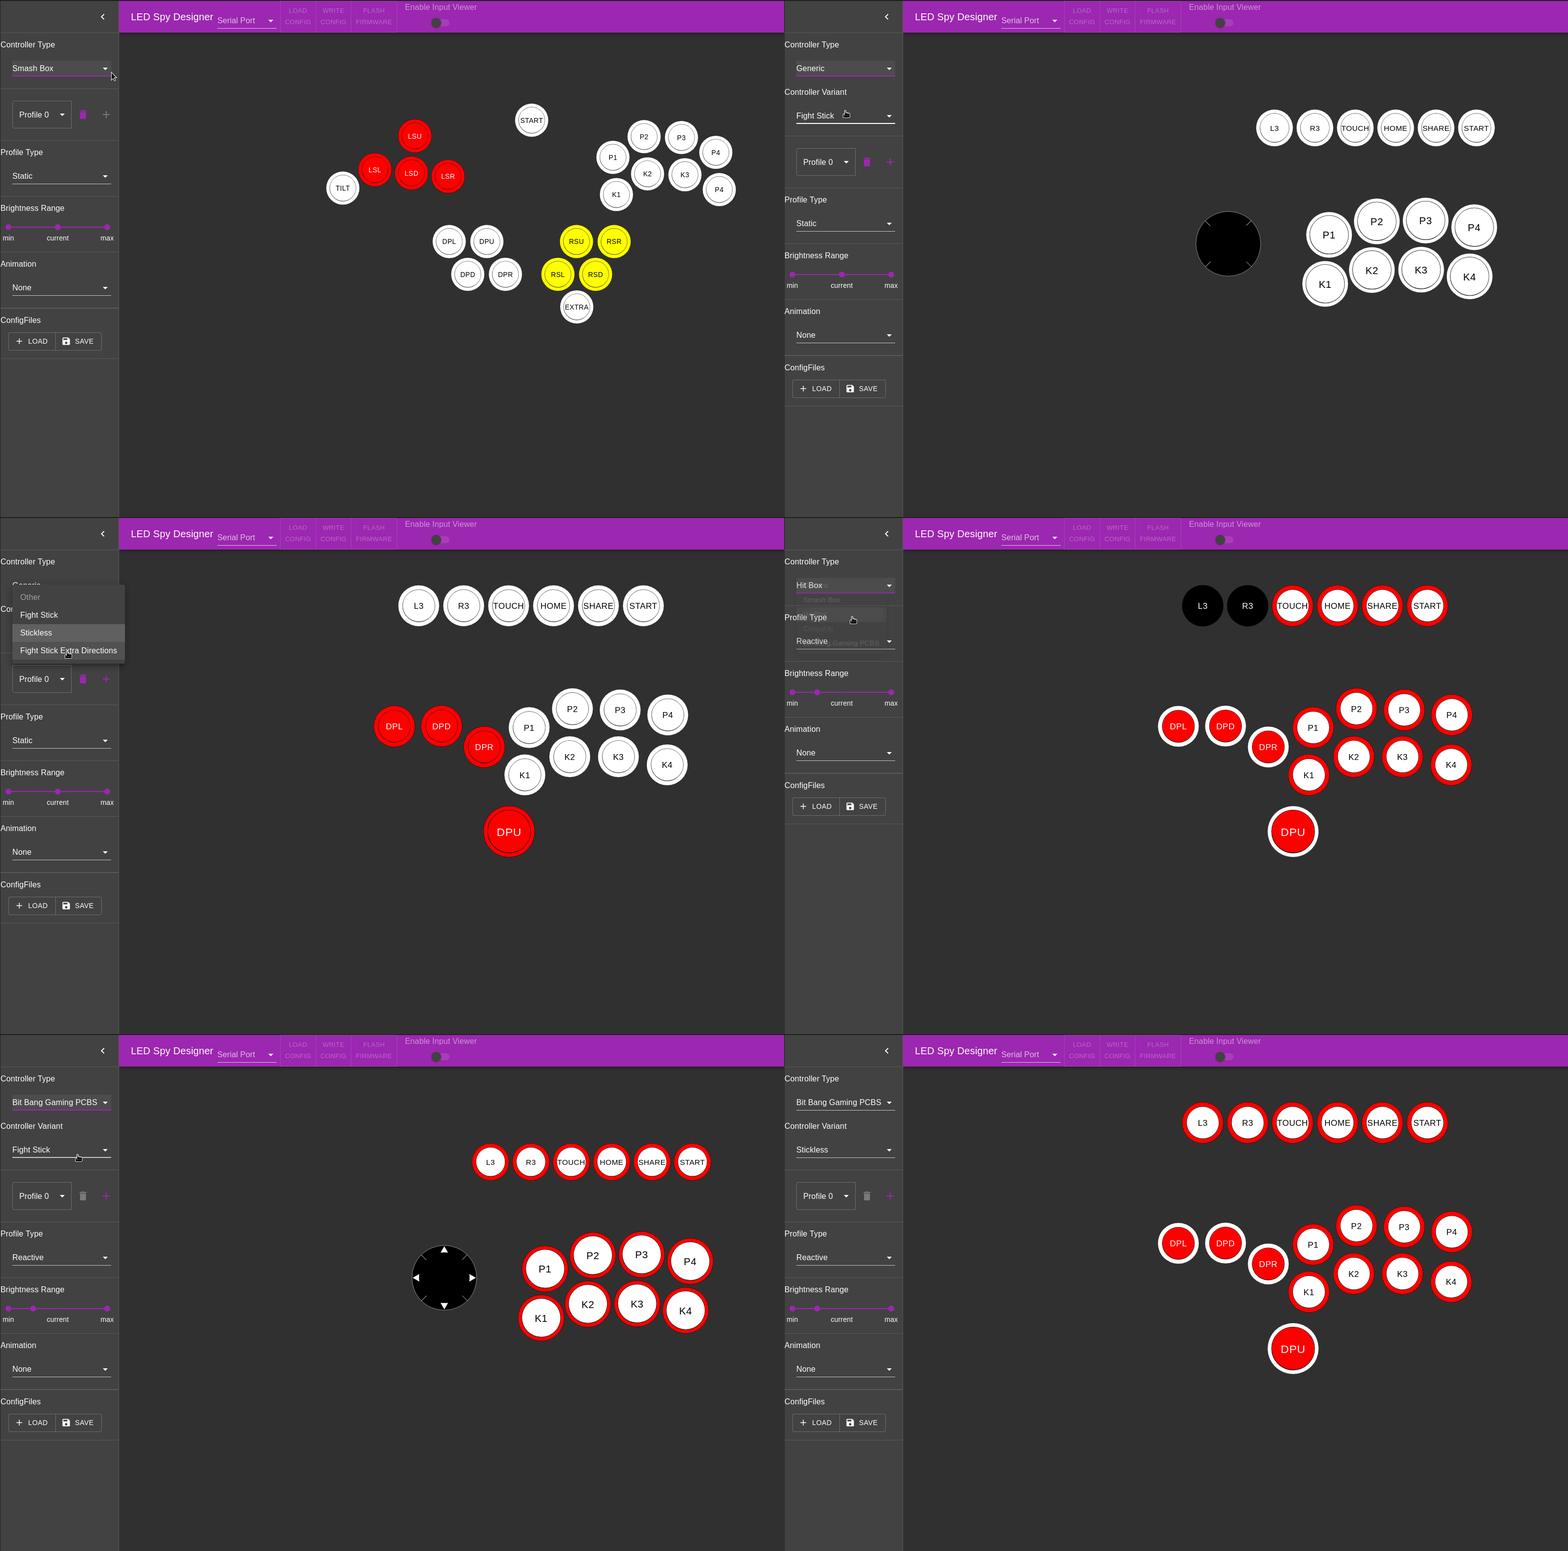
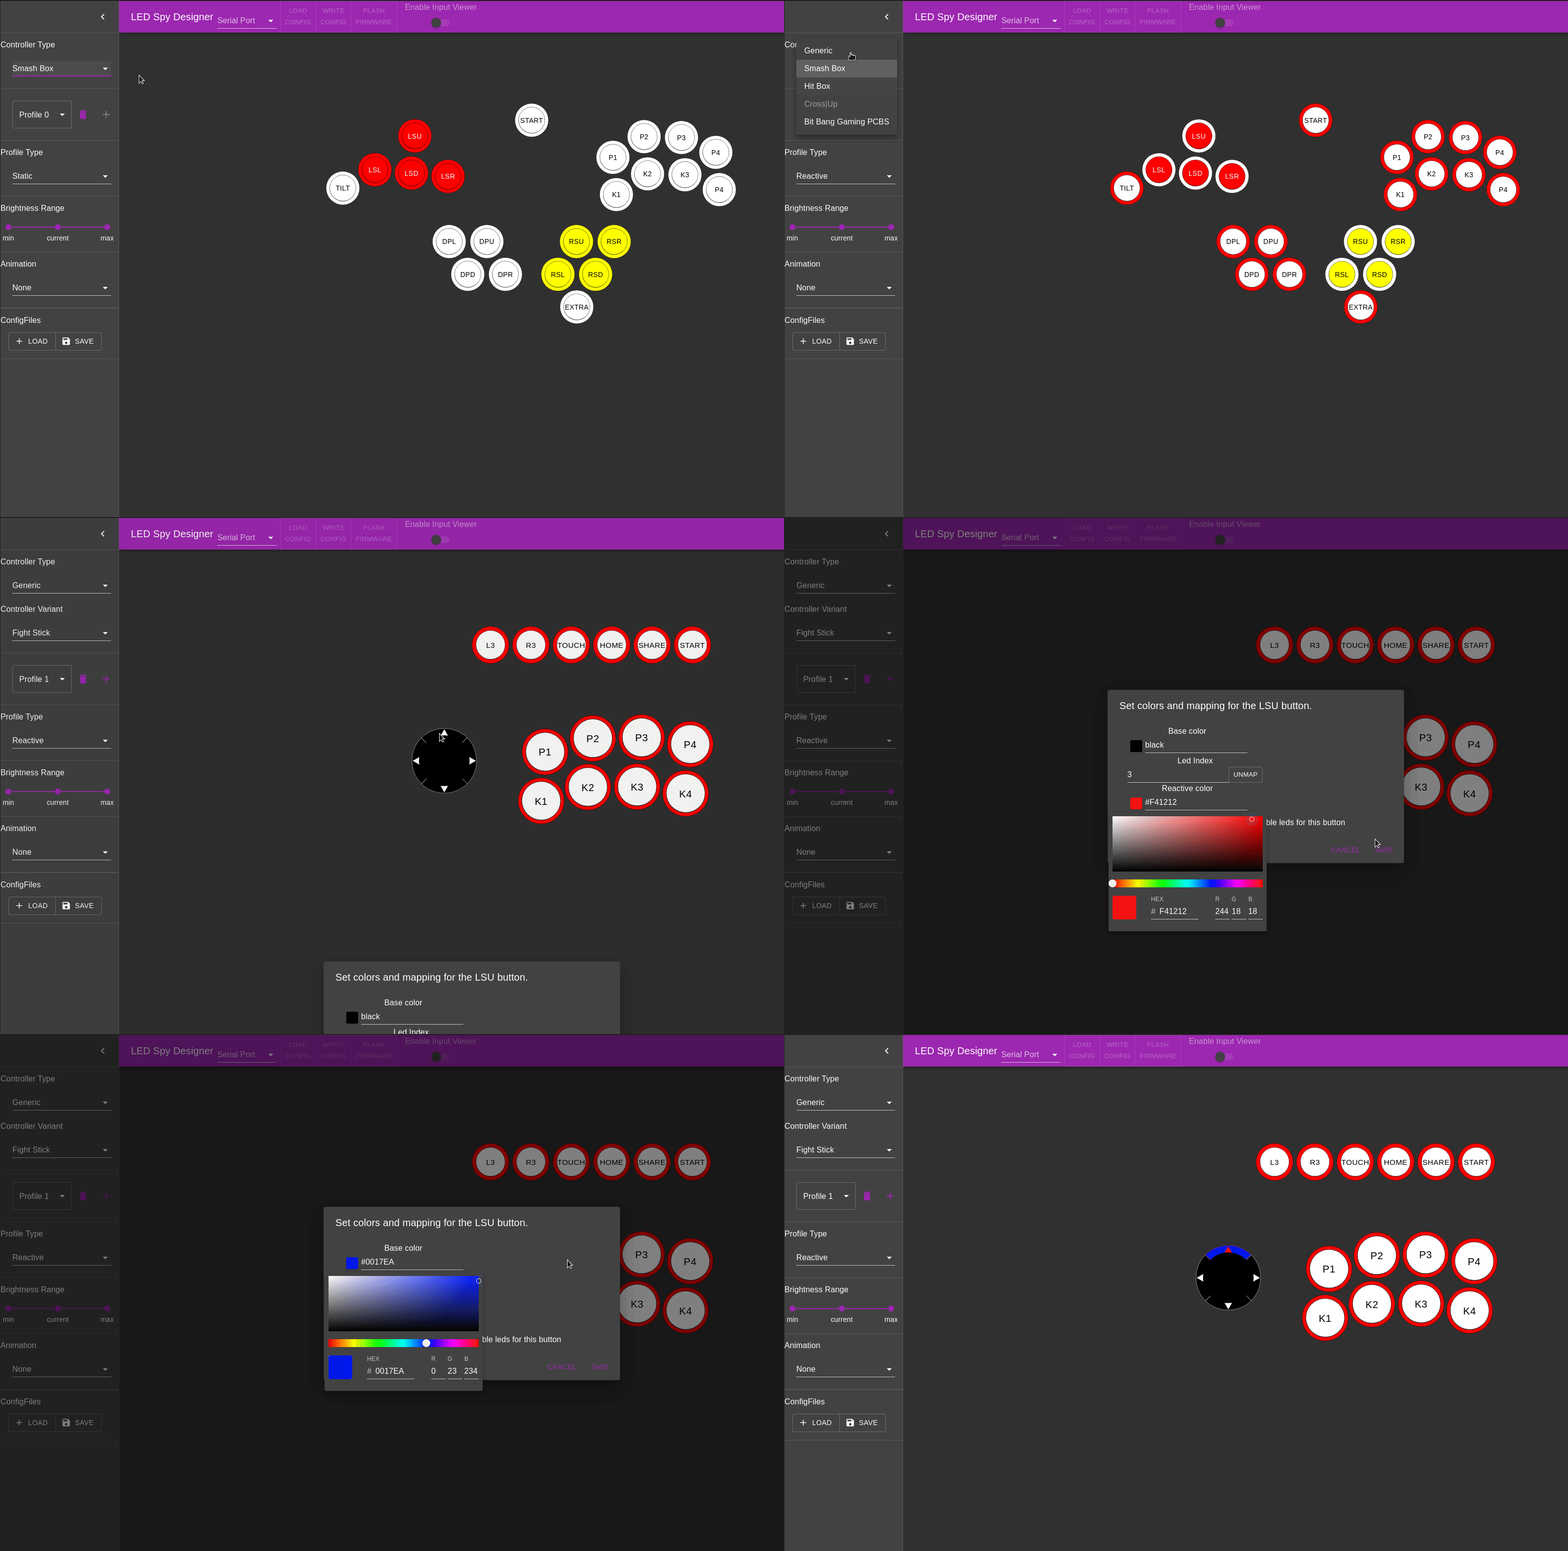
Managing Controller Types
LED Spy 2 currently supports several controller types, and some with multiple variants, with more to come.
Button Colors and Mappings
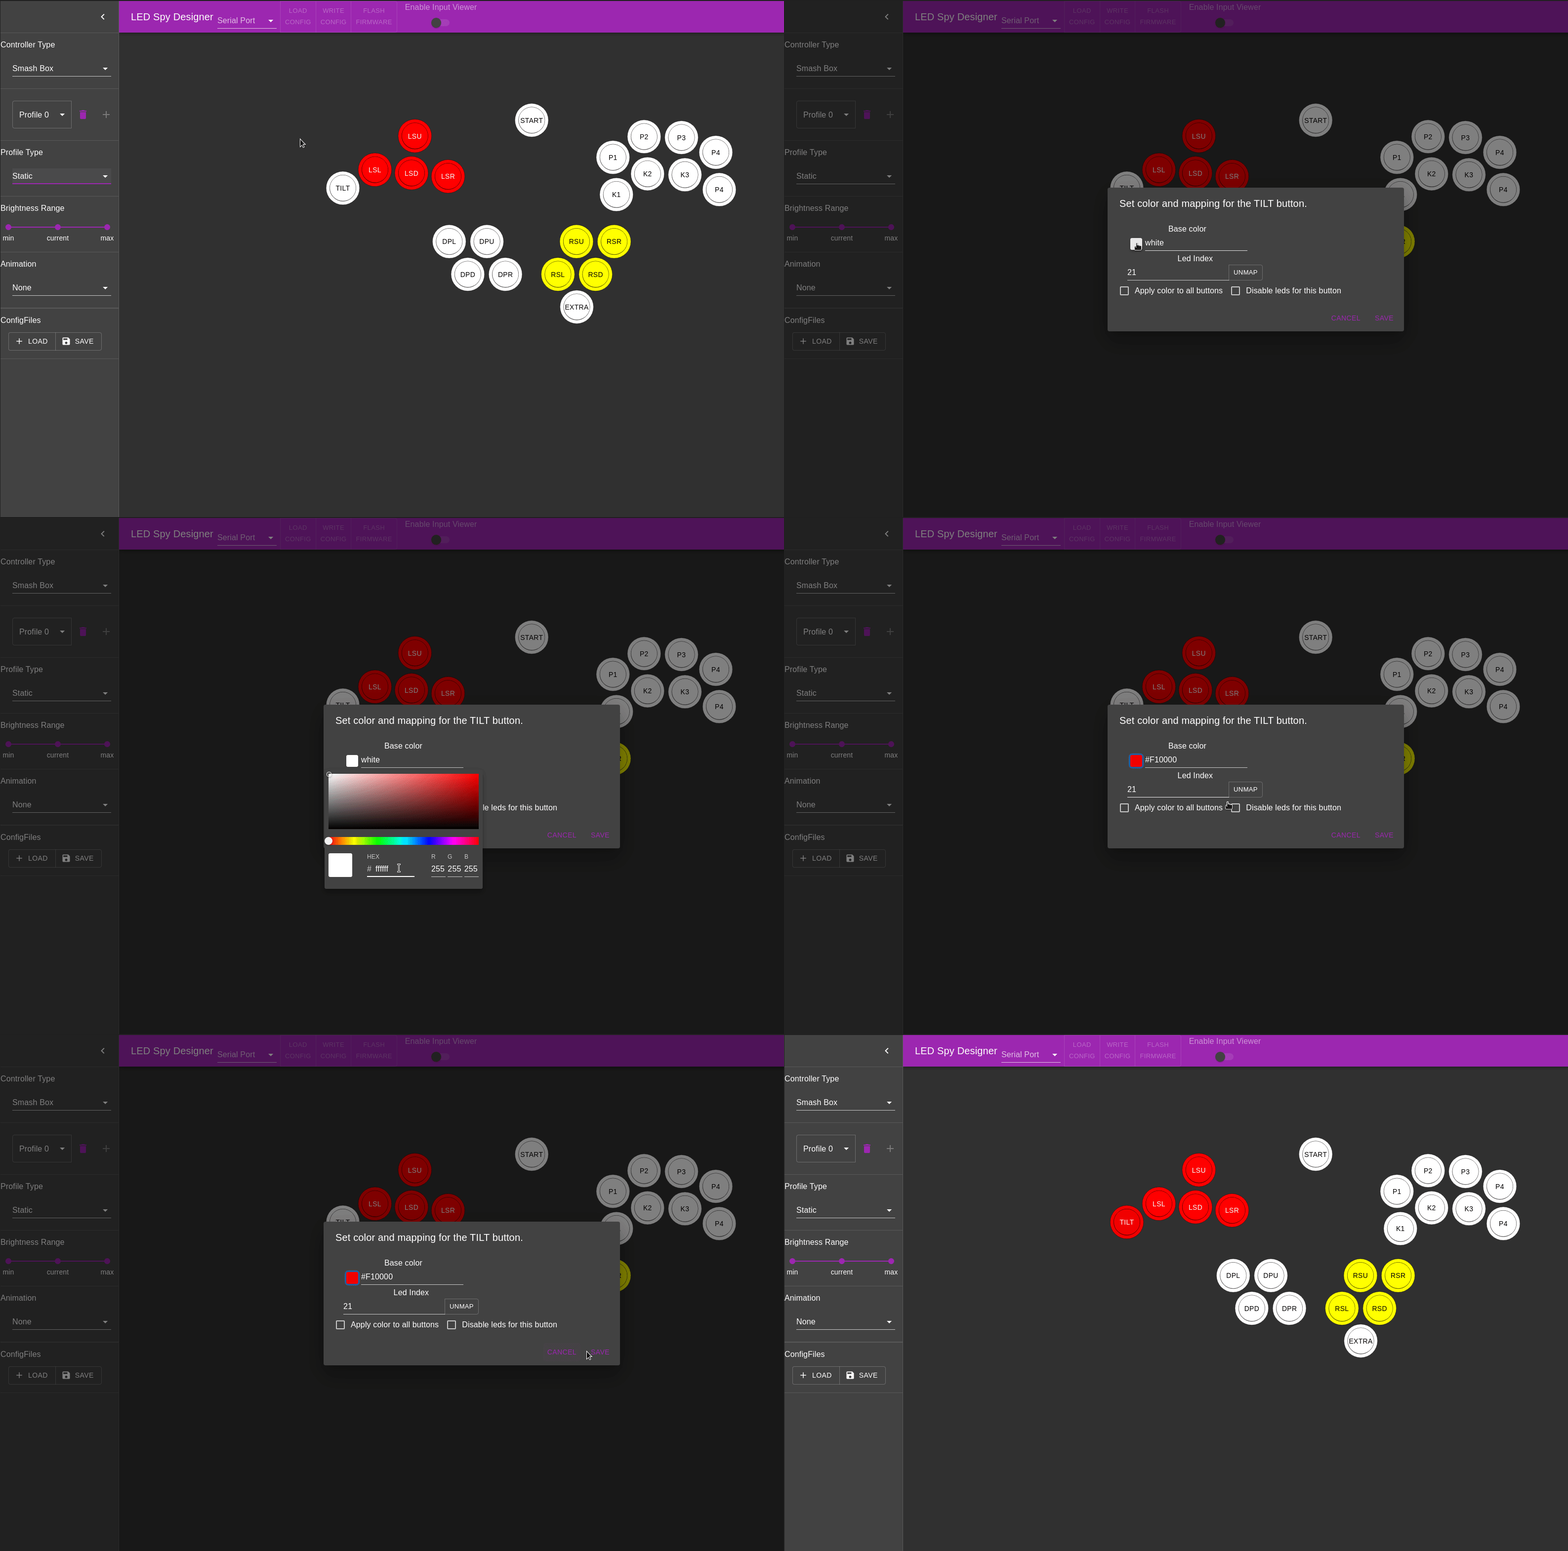
Button colors and mappings can be set by clicking on the button/stick axis and setting them.
-
Base Button Color Mapping
-
Reactive Colors
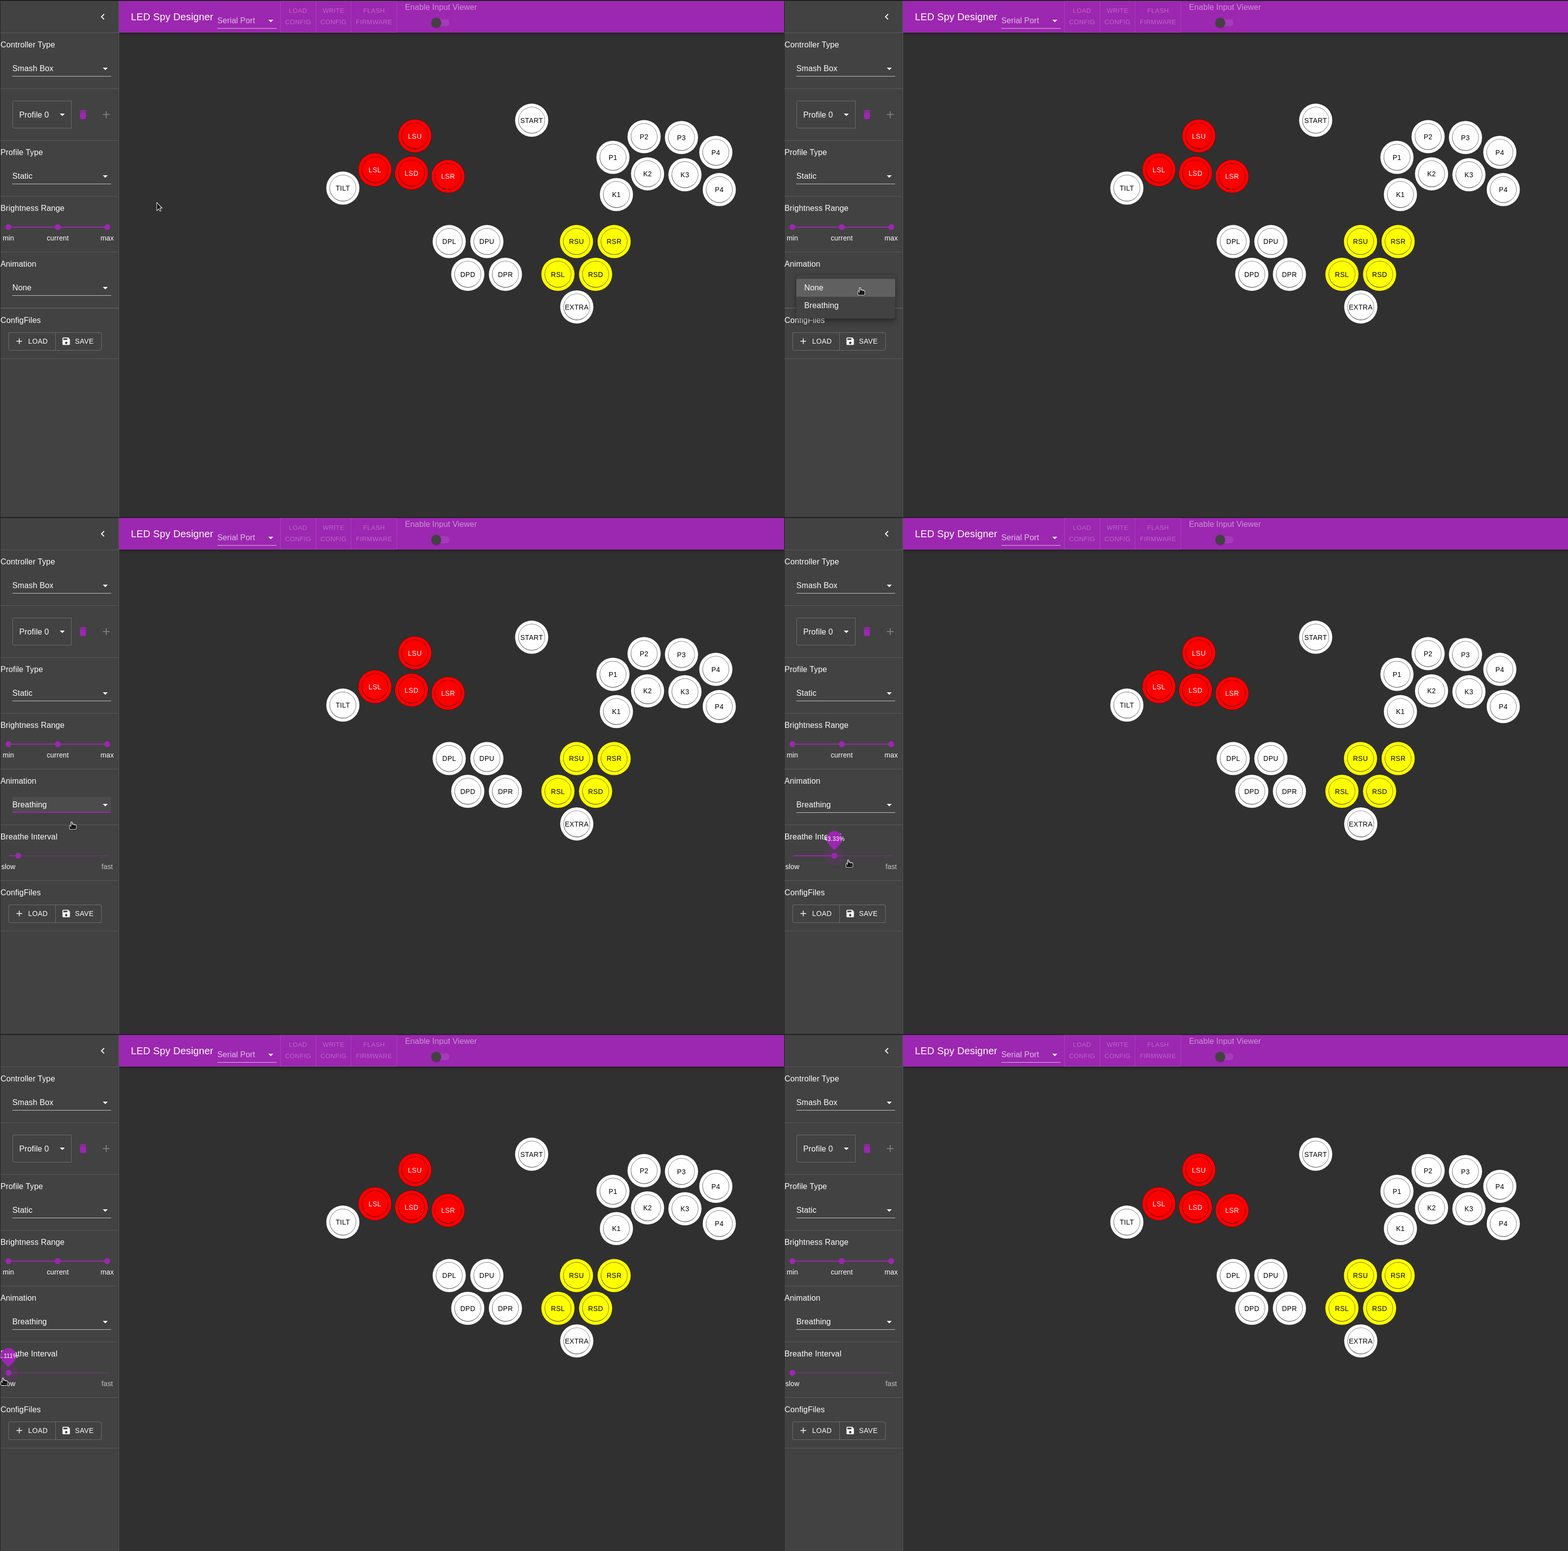
Setting Animations
Currently LED Spy 2 has one supported animation and that is a Breathing effect, you can configure the speed of the effect using the Breathe Interval setting.
Profiles
LED Spy supports multiple profiles, currently this feature is limited to controllers with profile switches, but I plan to introduce it to all controllers once Hotkeys are implemented.
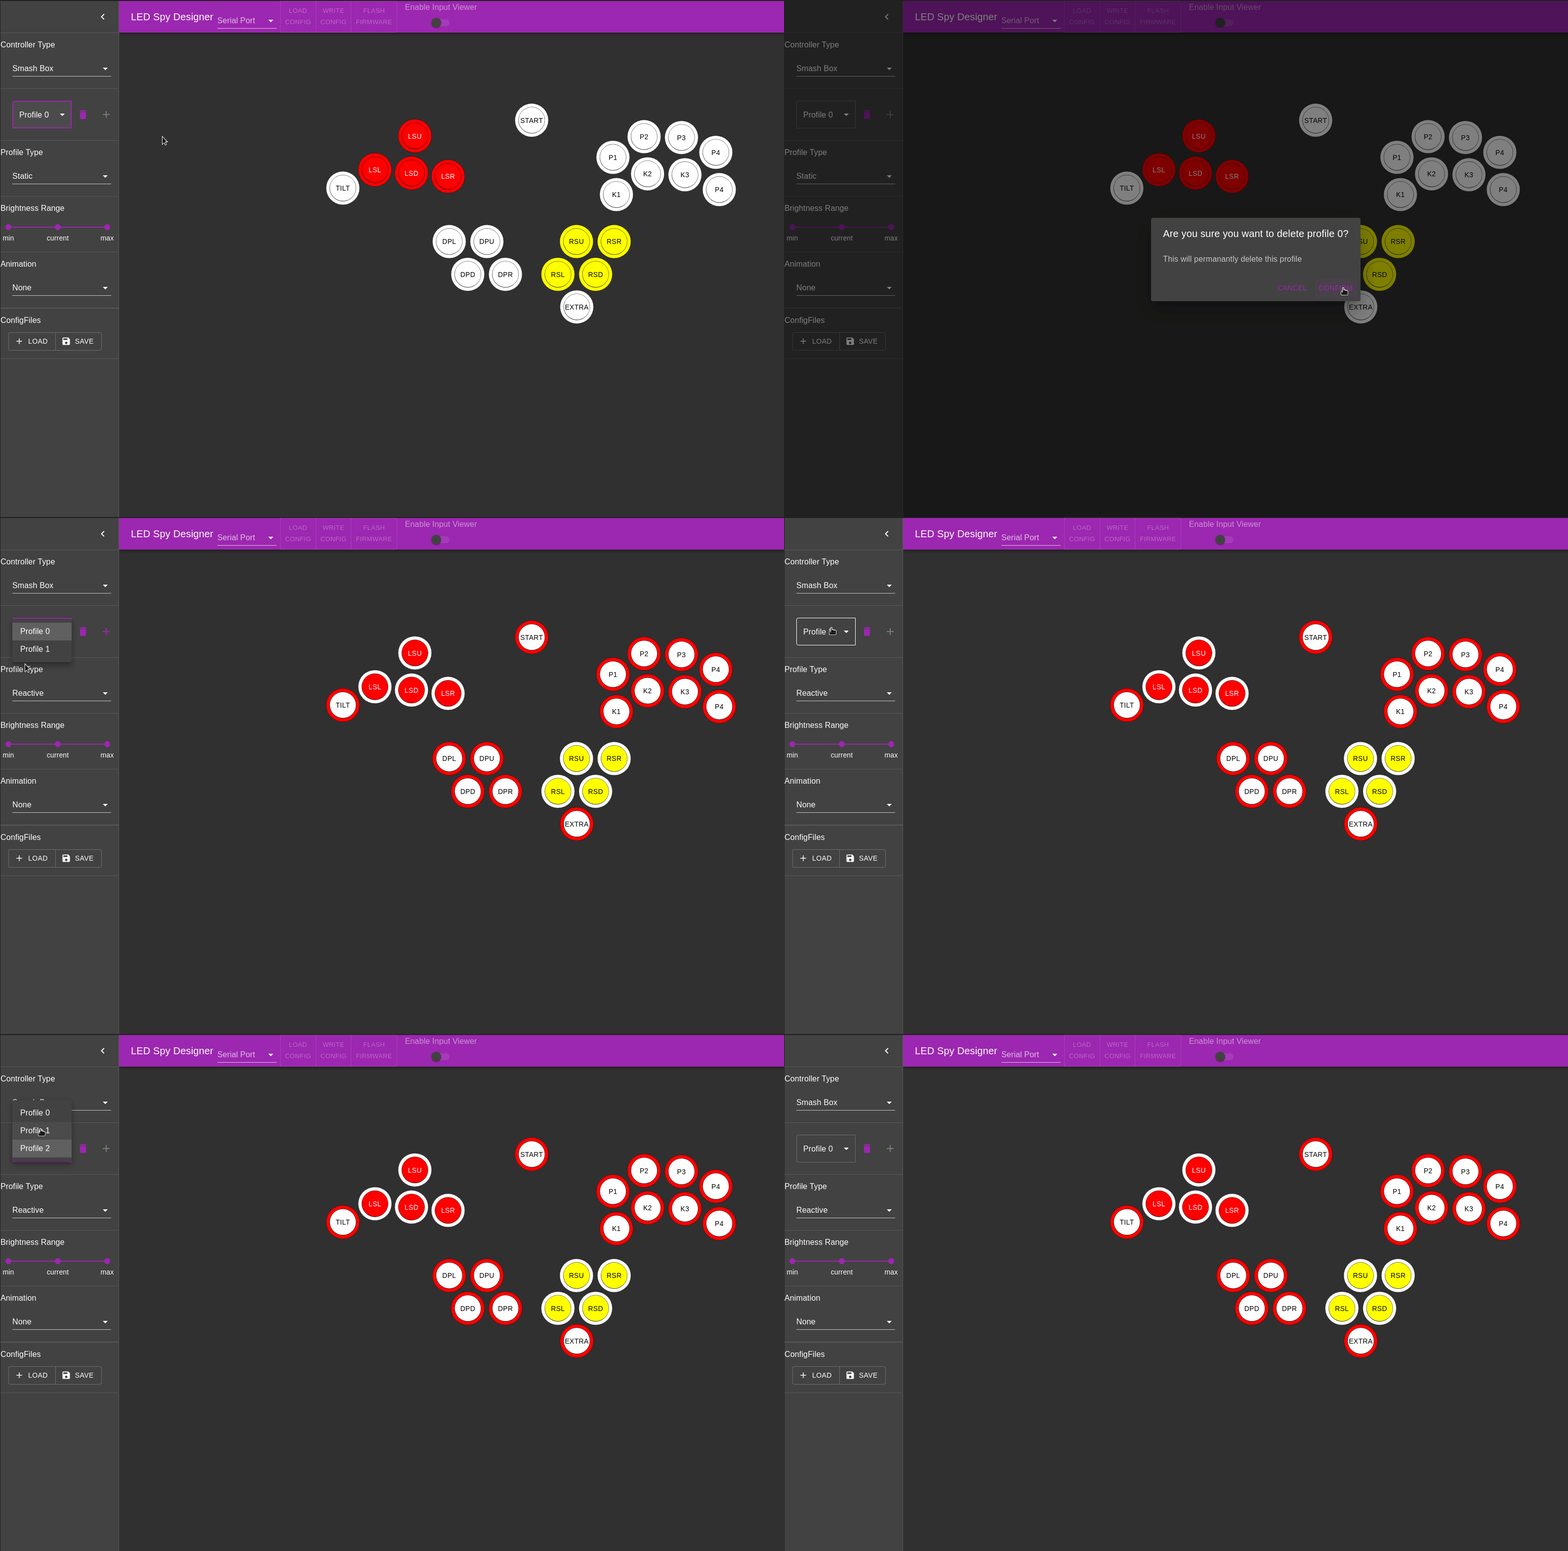
Profile switch support is also supported in input display, and will automatically switch based on the current state of the controller.
